How to add a Scaffold
You can only create a scaffold in the mobile app.
Scaffold fields explained
When adding a scaffold, you’ll be asked to complete the following fields.
| Field | Meaning |
|---|---|
| Scaffold description | Briefly describe the scaffold and its purpose. |
| Location on-site | Specify where the scaffold is located on site. |
| Date of erection | The date the scaffold was erected. |
| Inspection schedule | How often the scaffold must be inspected, from 1 to 28 days. |
| Mandatory photo count per inspection | The minimum number of photos required for each inspection. |
| Duty Category | The scaffold duty category. |
| Additional scaffold details (optional) | Add any extra details, such as building reference, level, scaffold width, scaffold system, access points, or other relevant notes. |
Add a scaffold in the mobile app
1From the Scafflinq app, go to Projects and select the project where you want to onboard a new scaffold.
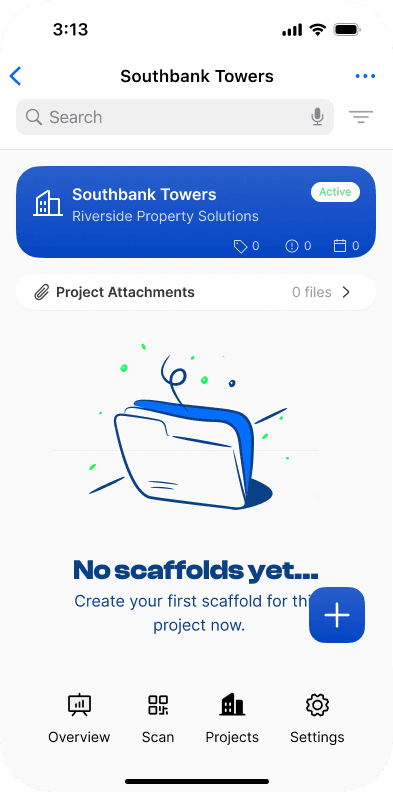
2Tap the
+ button in the bottom-right corner of the screen to scan a new Scafflinq tag.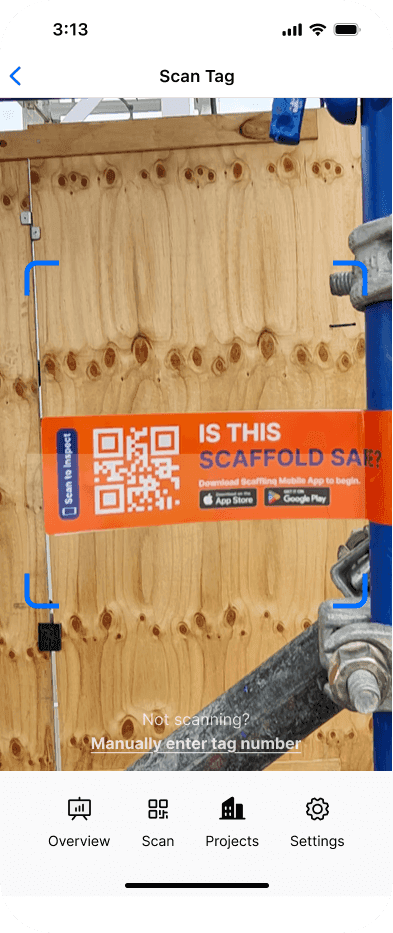
You can manually enter the Scafflinq tag code by tapping
Manually enter tag number
3Fill out the scaffold details on screen, then tap
Continue to inspection to create the handover.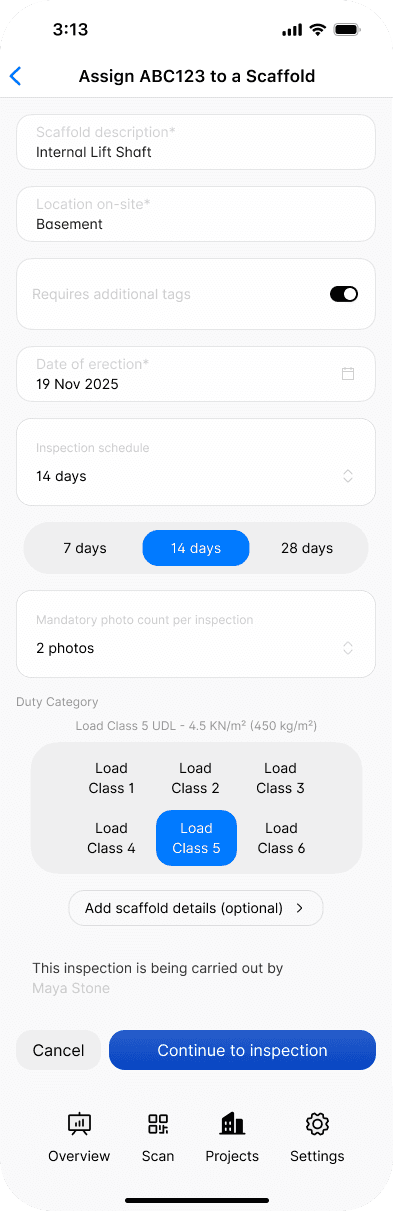
4Conduct your first scaffold inspection by following the guide here: https://www.scafflinq.com/help-centre/how-to-inspect-a-scaffold
Still got questions?
Pick whichever suits, we’ll get back to you either way.